
2 min read
Odoo Development: Configurable Kanban state
With the Odoo framework it is pretty easy to create a kanban view that groups and sorts an item by a state field. I’ll show how a kanban view can be added in a few steps.
The examples are based on the Odoo App Certificate Planner.
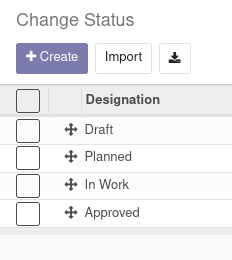
We are going to create a configurable state for our model change. First create a model that defines the state.
models/change_status.py
from odoo import models, fields, api, _

class ChangeStatus(models.Model):
    _name = 'requirement.change_status'
    _description = 'Requirement Change Status'
    _rec_name = 'designation'
    _order = 'sequence'

    # fields
    designation = fields.Char()
    sequence = fields.Integer()
And add views for the new model.
views/change_status.xml
<odoo>

  <record model="ir.ui.view" id="change_status_search">
    <field name="name">Change Status Search</field>
    <field name="model">Requirement.change_status</field>
    <field name="arch" type="xml">
      <search>
        <field name="designation"/>
      </search>
    </field>
  </record>

  <record model="ir.ui.view" id="change_status_list">
    <field name="name">Change Status List</field>
    <field name="model">Requirement.change_status</field>
    <field name="arch" type="xml">
      <tree limit="200">
        <field name="sequence" widget="handle"/>
        <field name="designation"/>
      </tree>
    </field>
  </record>

  <record model="ir.ui.view" id="change_status_form">
    <field name="name">Change Status Form</field>
    <field name="model">requirement.change_status</field>
    <field name="arch" type="xml">
      <form string="Change Status Form">
        <sheet>
          <p>Change Status</p>
          <div class="oe_title">
            <div class="oe_edit_only">
              <label for="designation"/>
            </div>
            <h1>
              <field name="designation"/>
            </h1>
          </div>
          <p>Last edit by <field name="write_uid"/> on <field name="write_date"/>.<br/>
          Created by <field name="create_uid"/> on <field name="create_date"/>.</p>
        </sheet>
      </form>
    </field>
  </record>

</odoo>
Ensure that security groups and menu entries exist for the model.
Next we add a reference to the change model.
models/change.py
class Change(models.Model):
	status_id = fields.Many2one("requirement.change_status", track_visibility="always", ondelete='restrict')
This field should be tracked and also creates a constraint that prevents the referenced status from being deleted.
Create a kanban view and display the statusbar in the form view.
views/change.xml
  <record model="ir.ui.view" id="change_kanban" >
    <field name="name">Change Kanban</field>
    <field name="model">requirement.change</field>
    <field name="arch" type="xml">
      <kanban default_group_by="status_id" class="o_kanban_small_column">
        <field name="change_id_id"/>
        <field name="certificate_id"/>
        <templates>
        <t t-name="kanban-box">
          <div class="oe_kanban_card oe_kanban_global_click">
            <div class="oe_kanban_content">
              <strong>
                <field name="change_id_id"/>
              </strong>
              <field name="certificate_id"/>
            </div>
          </div>
        </t>
        </templates>
      </kanban>
    </field>
  </record>

  <record model="ir.ui.view" id="change_form">
    <field name="name">Change Form</field>
    <field name="model">requirement.change</field>
    <field name="arch" type="xml">
      <form string="Change Form">
        <header>
          <field name="status_id" widget="statusbar" options="{'clickable': '1'}"/>
        </header>
        <sheet>
This wil result in the following UI.
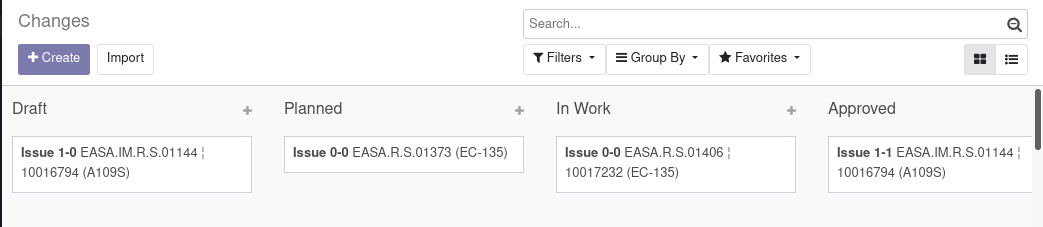
New states can be added and removed. The statusbar to set the state appears on the top right of the form.

Tags: odoo , development , tutorial
Edit Page / Show Statistic