5 min read
Meteor and React: Markdown editor with draft.js and marked.js
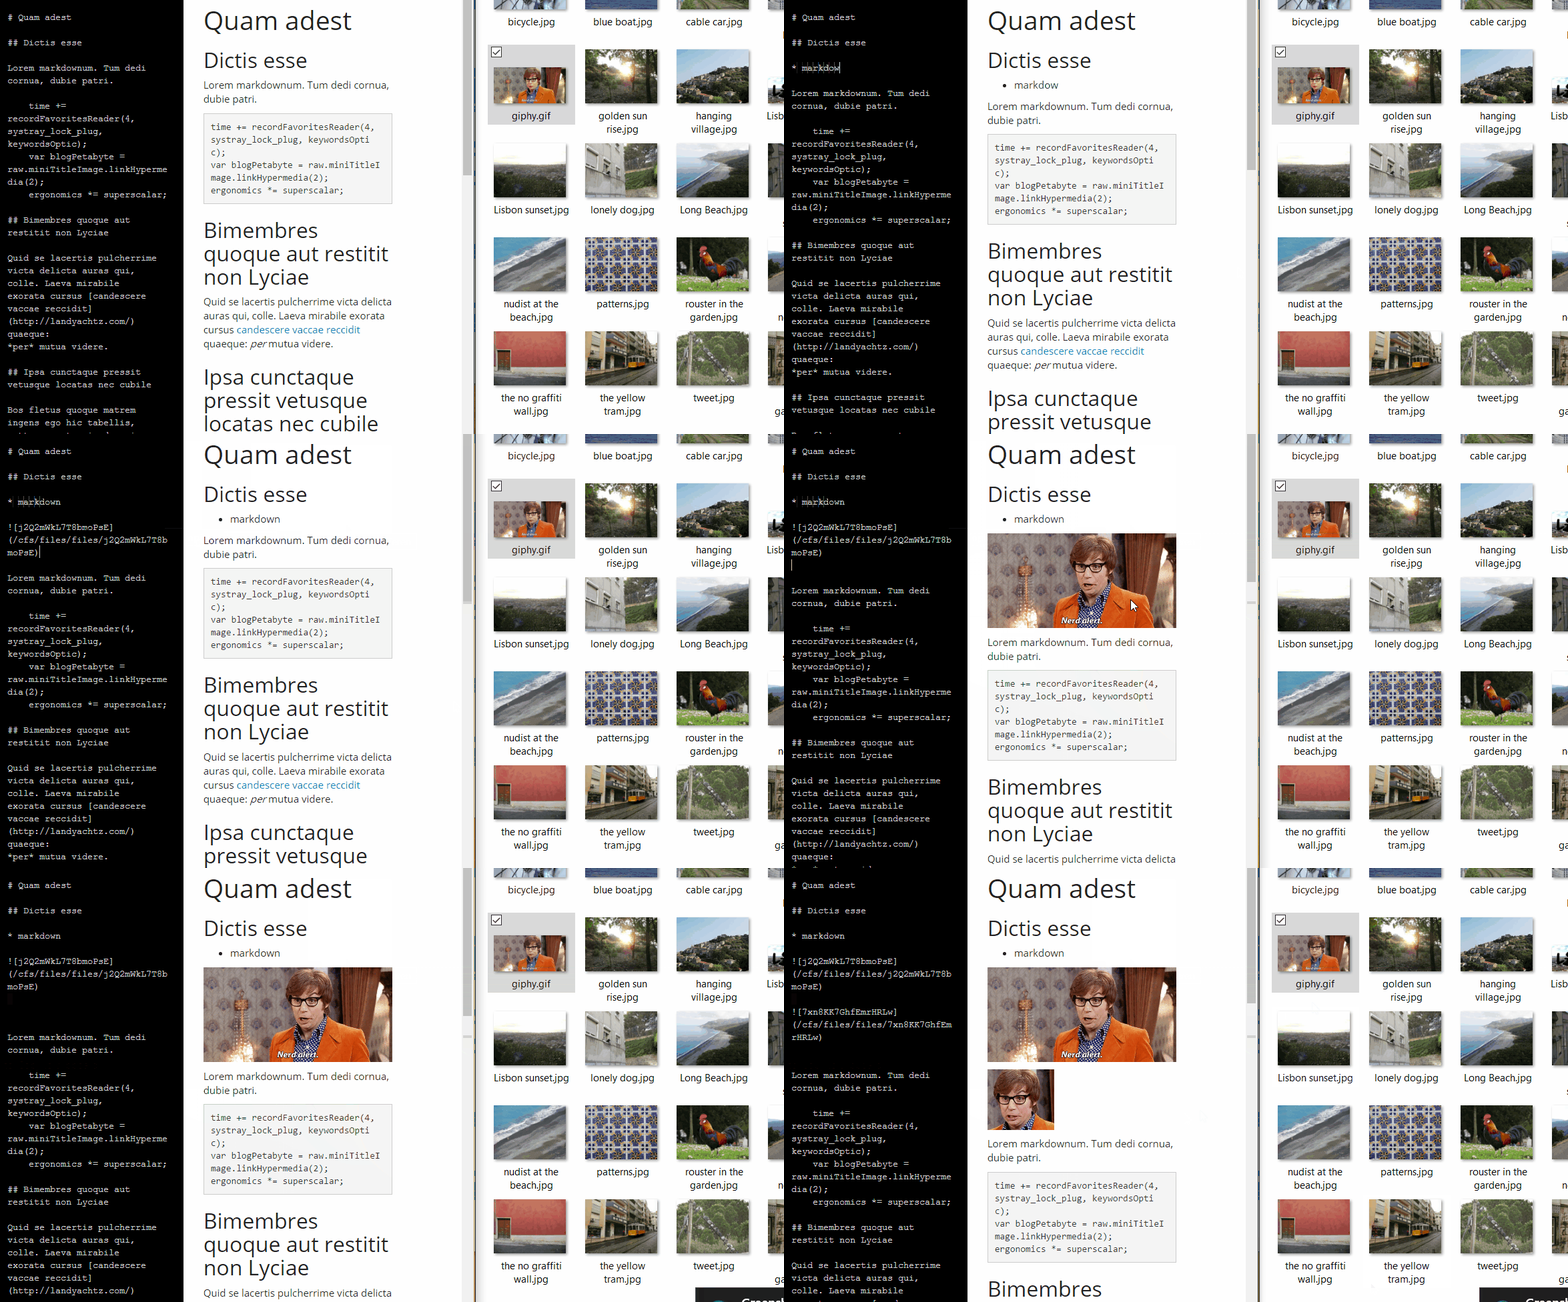
Recently I switched my current project from Meteor 1.2 to 1.3. While doing so I reworked the code for my markdown editor. When created the markdown editor in the first place I learned about the necessity of a solid platform to build web editors. So this time I used draft.js as base. Facebook open sourced draft.js a few months ago. They use it almost everywhere on Facebook page, so it should be well-tested.
The markdown editor you’re going to build has these features:
- Instant html preview rendering
- Support for GitHub flavoured syntax and markdown tables
- Drag and drop file upload.
- Copy and paste file upload.
Optionally: File upload with Meteor and FS Collection.
Preview:

So let’s get started. I assume you’re already running an application with React and Bootstrap and know how you can add new packages from npm to your project.
Let’s just do this now. Install draft.js and marked with npm. We will use both libraries in the editor react component.
Then create a skeleton for the editor component. We will move on by extending every of these react functions. Create the following file:
MarkdownEditor.jsx
import React from 'react';
import ReactDOM from 'react-dom';
import {Editor, EditorState, ContentState, Modifier} from 'draft-js';
import marked from '../configs/marked';

import { GridRow, GridColumn } from '../../bootstrap/components/index.jsx';

export default class MarkdownEditor extends React.Component {

  constructor(props) {}

  update(editorState) {}

  upload(file, selection){}

  handlePastedFiles(files){}

  handleDroppedFiles(selection, files){}

  render() {}
}
The only important thing to mention here is the bootstrap import. I have my own bootstrap component in another directory. Feel free to use pre-built bootstrap components or replace GridRow and GridColumn later on. What I basically do with them is building the separated markdown input and preview panels. There are many other ways to achieve a similar result as you will see.
Next configure marked.js. For this create new file and store it where you would like to import it from. My file is in a sibling folder called configs.
marked.js
import marked from 'marked';

marked.setOptions({
  gfm: true,
  tables: true
});

export default marked;
Very simple. Import the marked function and configure it with options. The gfm option stand for GitHub flavoured markdown.
If you did so, complete the constructor with the following piece of code.
MarkdownEditor.jsx
...

  constructor(props) {
    super(props);
    this.state = {
      htmlRendered: marked(this.props.text),
      editorState: EditorState.createWithContent(ContentState.createFromText(this.props.text))
    };
    this.focus = () => this.refs.editor.focus();
  }

...
The first state contains the rendered html code. The second state is the editor itself. Draft.js editor can be manipulated with this state.
Next complete the update function.
MarkdownEditor.jsx
...

  update(editorState) {
    var text = editorState.getCurrentContent().getPlainText();
    this.setState({
      editorState: editorState,
      htmlRendered: marked(text)
    });
    this.props.onChange({
      target: {
          value: text,
          name: this.props.name
      }
    });
  }

...
Whenever the editor input is change we will call the update function. Within this function you’ll define what actions to call. What I do is updating both states and calling the onChange function, which is defined by the parent component.
As of writing this I’m still not sure whether this is a good approach. Not sure if the editor should auto save the content periodically f.g. every 2 seconds or like I’ll show you here, whenever an input is made.
Before completing the render function and the upload function, define file paste and drop handler. These two functions are bound to the editor and will call the upload function for every dropped or pasted file.
MarkdownEditor.jsx
...

  handlePastedFiles(files){
    _.each(files, (file) => {
      this.upload(file);
    });
  }

  handleDroppedFiles(selection, files){
    _.each(files, (file) => {
      this.upload(file, selection);
    });
  }

...
Now the render function. Important here, ignore the GridRow and GridColumn. They both are bootstrap components, which I use to build the layout. Use whatever pleases you.
MarkdownEditor.jsx
...

render() {
    const {editorState} = this.state;
    return (
      <GridRow className="markdown-editor">
        <GridColumn className="col-md-6" onClick={this.focus}>
          <GridColumn className="markdown">
          <Editor
            editorState={editorState}
            onChange={this.update.bind(this)}
            handlePastedFiles={this.handlePastedFiles.bind(this)}
            handleDroppedFiles={this.handleDroppedFiles.bind(this)}
            ref="editor" />
          </GridColumn>
        </GridColumn>
        <GridColumn className="col-md-6">
          <GridColumn className="preview">
          <div dangerouslySetInnerHTML={{__html: this.state.htmlRendered}} />
          </GridColumn>
        </GridColumn>
      </GridRow>
    );
  }

...
Every function is now connected with an element. The Editor tag is the draft.js component. No more explanation needed.
Finally the upload function.
MarkdownEditor.jsx
...

upload(file, selection){

    // upload and get markdown formatted url
    var mdUrl = this.props.upload(file);

    // insert url at current position
    const editorState = this.state.editorState;
    const contentState = editorState.getCurrentContent();
    const selectionState = editorState.getSelection();
    if(!selection){selection = selectionState;}
    const cs = Modifier.insertText(contentState, selection, mdUrl)
    const es = EditorState.push(editorState, cs, 'insert-fragment');
    this.setState({editorState: es});
  }

...
For every call the file is uploaded a url is inserted into the editor at the current position. The upload function is just another call, sorry to disappoint you. If you’re asking where the upload actually happens, I can’t give you the answer. This really depends on your application framework. For this application I have used mantra where components, data collection and actions are totally separated. However I will show how to upload the file with Meteor and FS Collection. But remember the where this really happens depends on your application framework.
files.js
...
upload({Meteor, FlowRouter}, file) {
if(!("name" in file)){
var extension = file.type.split("/")[1];
file = new FS.File(file);
file.extension(extension);
file.name("clipboard." + extension);
}else{
file = new FS.File(file);
}
file.metadata = {name: file.name()};
var response = "empty";
file = Files.insert(file, (err, res) => {
if (err) {
notify.show(err.message, 'error');
}
});
var response = ""
if(file){
response = ''
}
return response;
}
...
If the file comes from the clipboard it doesn’t have a name. Only type and date is set. After inserting the file into the files collection the markdown url is built. The url here points to the FS Collection filesystem API.
I hope this tutorial was a help for your project. If you are interested to see my implementation in action, check out: https://github.com/BitSherpa/EverestCamp
Thanks for sharing.
Categories: JavaScript developmentTags: bootstrap , draftjs , facebook , markdown , meteor , react
Edit this page
Show statistic for this page